

[level: Novice]
The use of isometric grids (the sort of grid used to create the Postmodem logo) is certainly nothing new and often makes a resurgence along with ‘pixel art‘, so I knew it would be easy to find a grid on the web that would help me create the logo.
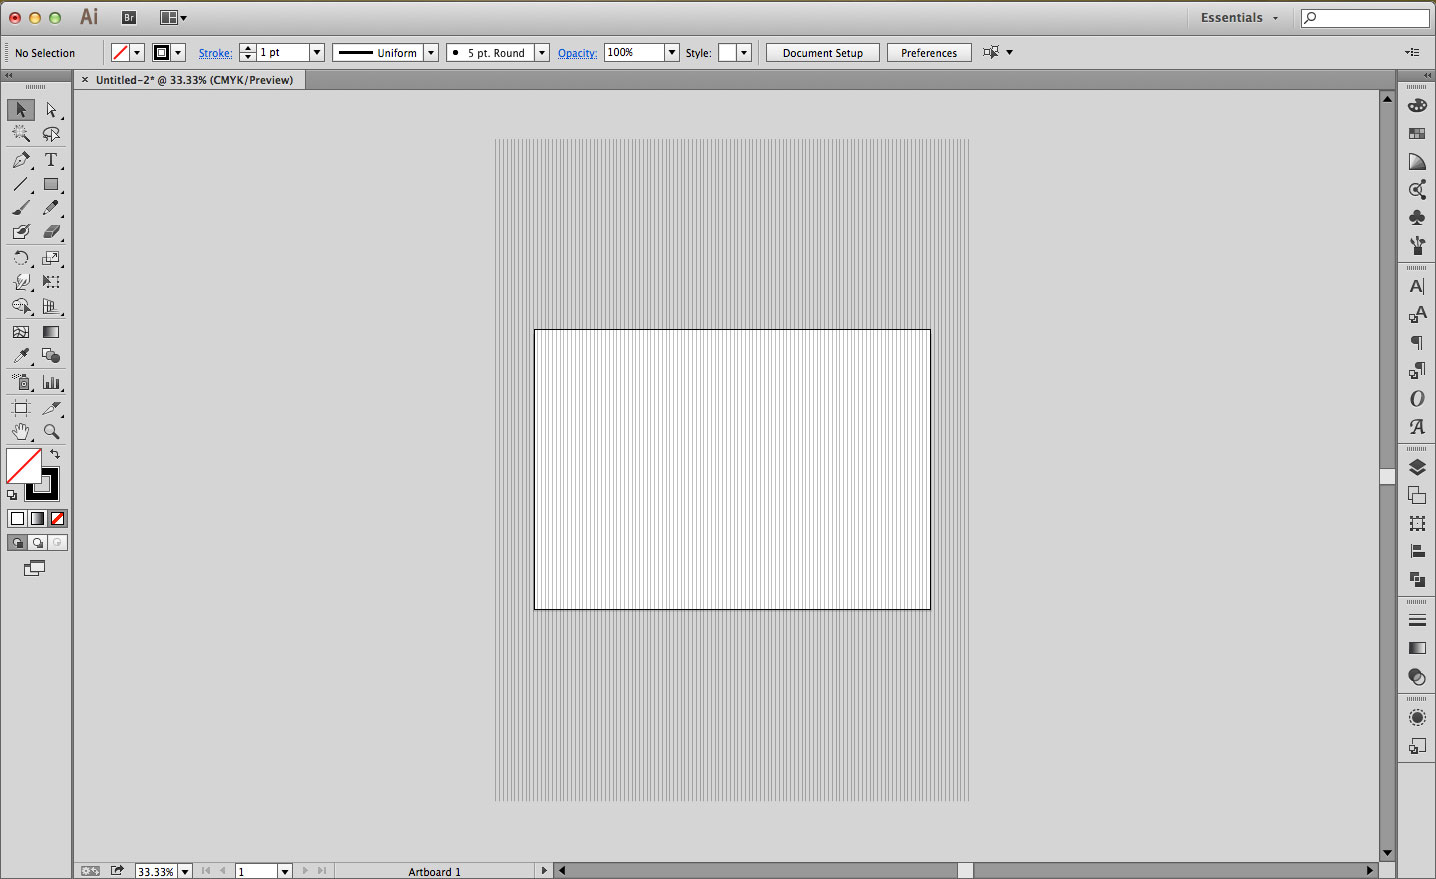
The problem is, the Illustrator file with the isometric grid that I downloaded (after a quick Google search) wasn’t quite as exact as I would have liked as you’ll see from the 6400% zoomed in view in Illustrator below.
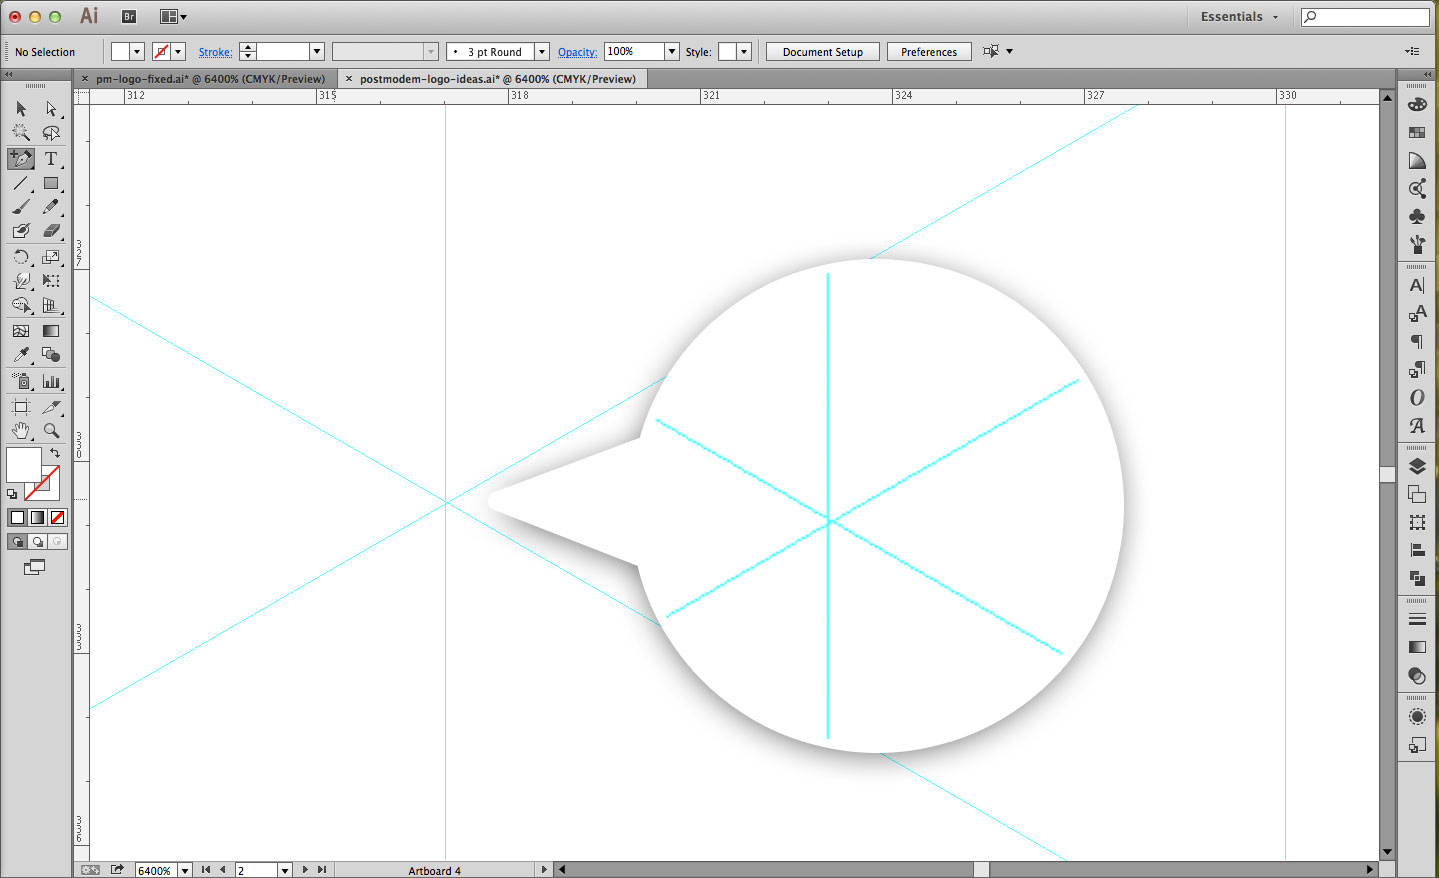
The vertical guides were just slightly off. Don’t get me wrong – I’d still be able to create the logo as the difference is hardly noticeable at all. However, this small issue bothered me enough to create my own grid and it was surprisingly easy so just in case this is useful to others I thought I’d share how I did it. (You’ll also find a set of isometric grid files to download for free at the end of this post)
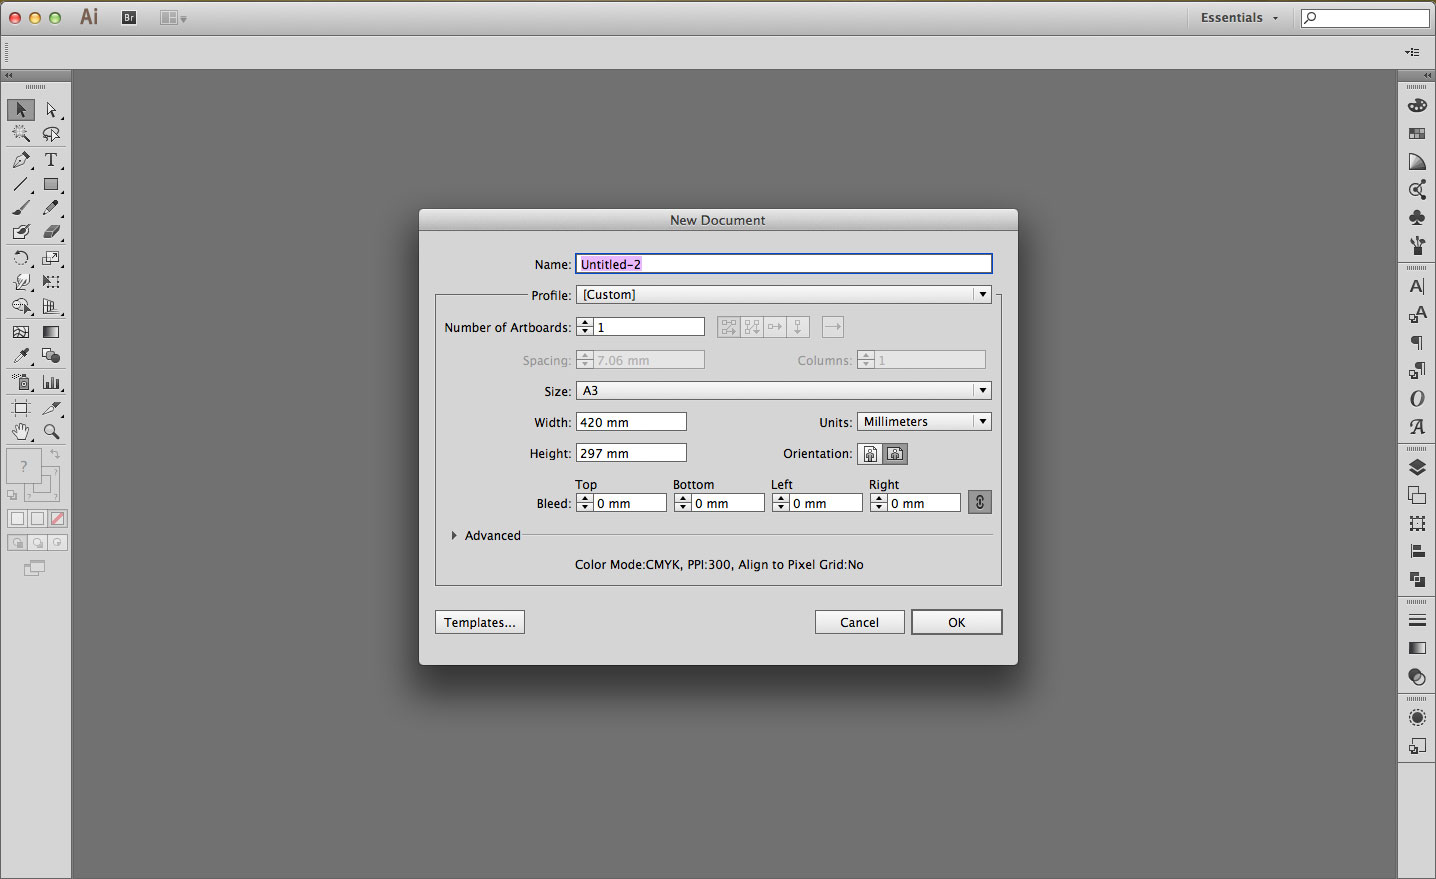
Step 1 – Create a new document
File > New…
[Mac: ⌘ + N | Win: Ctrl +N]
The size of the document is down to you but I wanted to use quite a large space with the potential to print large too so went for landscape A3.
STEP 2 – CREATE A Vertical Line longer than the artboard
Line tool – Keyboard shortcut: /
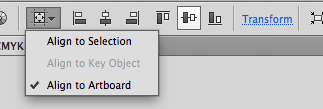
Draw a vertical line using the ‘Line tool’ that starts well above the start of the artboard and finishes below it (Hold down the shift key whilst drawing the line to ensure that it’s vertical).

With the line at the left hand side of the artboard as shown above (x = 0), you need to ensure that it’s vertically centred to the artboard. With the line selected, make sure the ‘Align to Artboard’ option is checked then choose ‘Vertical Align Center’ from the Path Menu Bar as shown here:
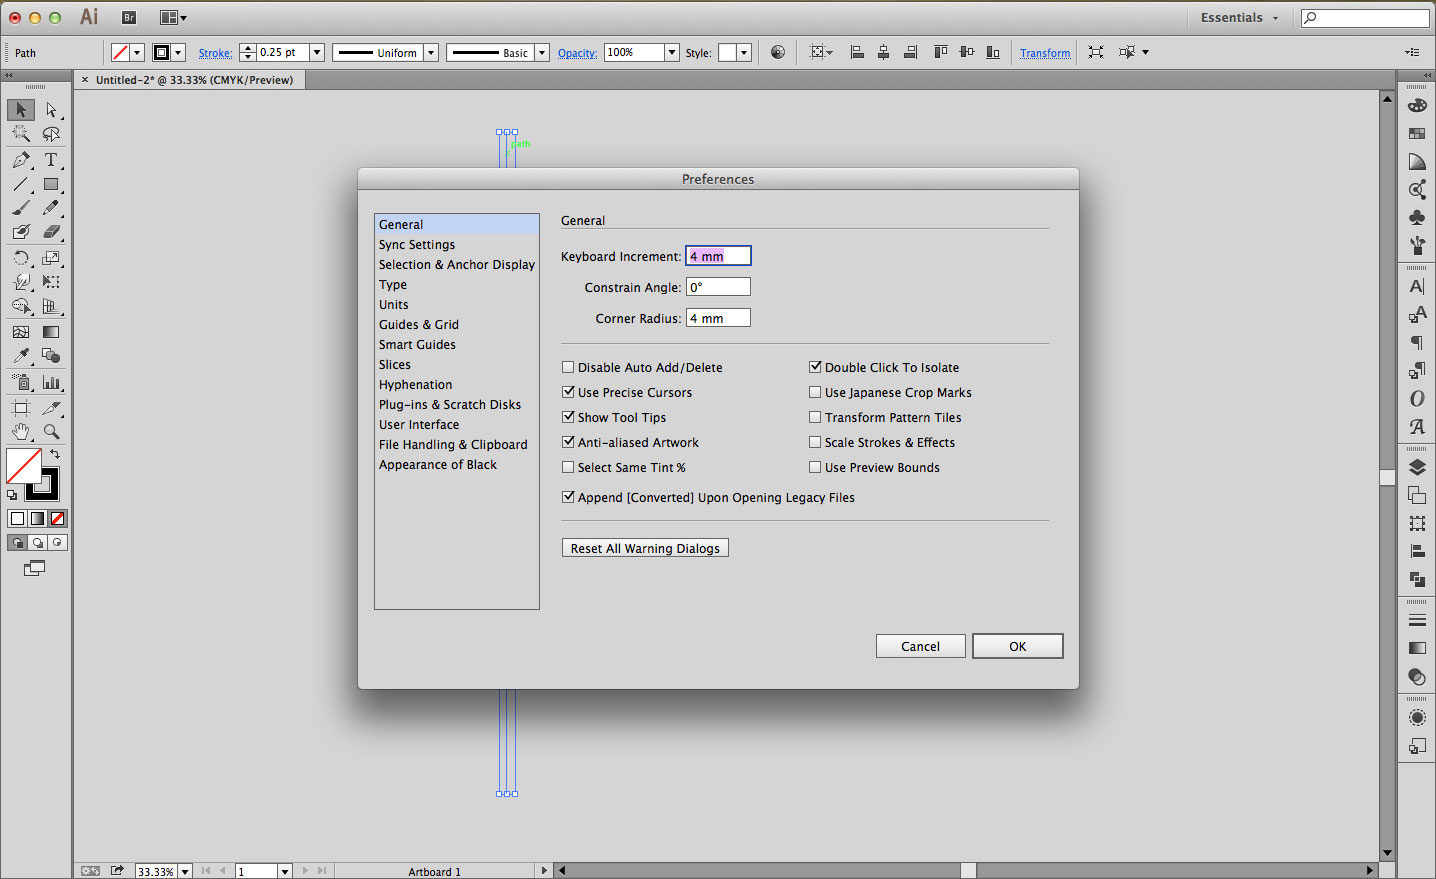
STEP 3 – Edit keyboard increments in preferences
Illustrator > Preferences > General
[MAC: ⌘ + K | WIN: CTRL +K]
Enter ‘4mm’ in the first input field labelled ‘Keyboard Increment’ then hit the OK button.
STEP 4 – (Quickly) Duplicate the vertical line
Holding down the Alt key, use the right and left arrow keys to duplicate the line horizontally. Make sure that you extend the lines further right and left of the artboard as shown below.
STEP 5 – Rotate & Copy the vertical lines by 60º
Rotate tool: Object > Transform > Rotate…
Select all of the vertical lines you’ve created (Mac: ⌘ + A | Win: CTRL +A) then use the Rotate tool. Enter 60 for the angle then hit the Copy button. You should now have a duplicate set of lines on the artboard and selected by default.

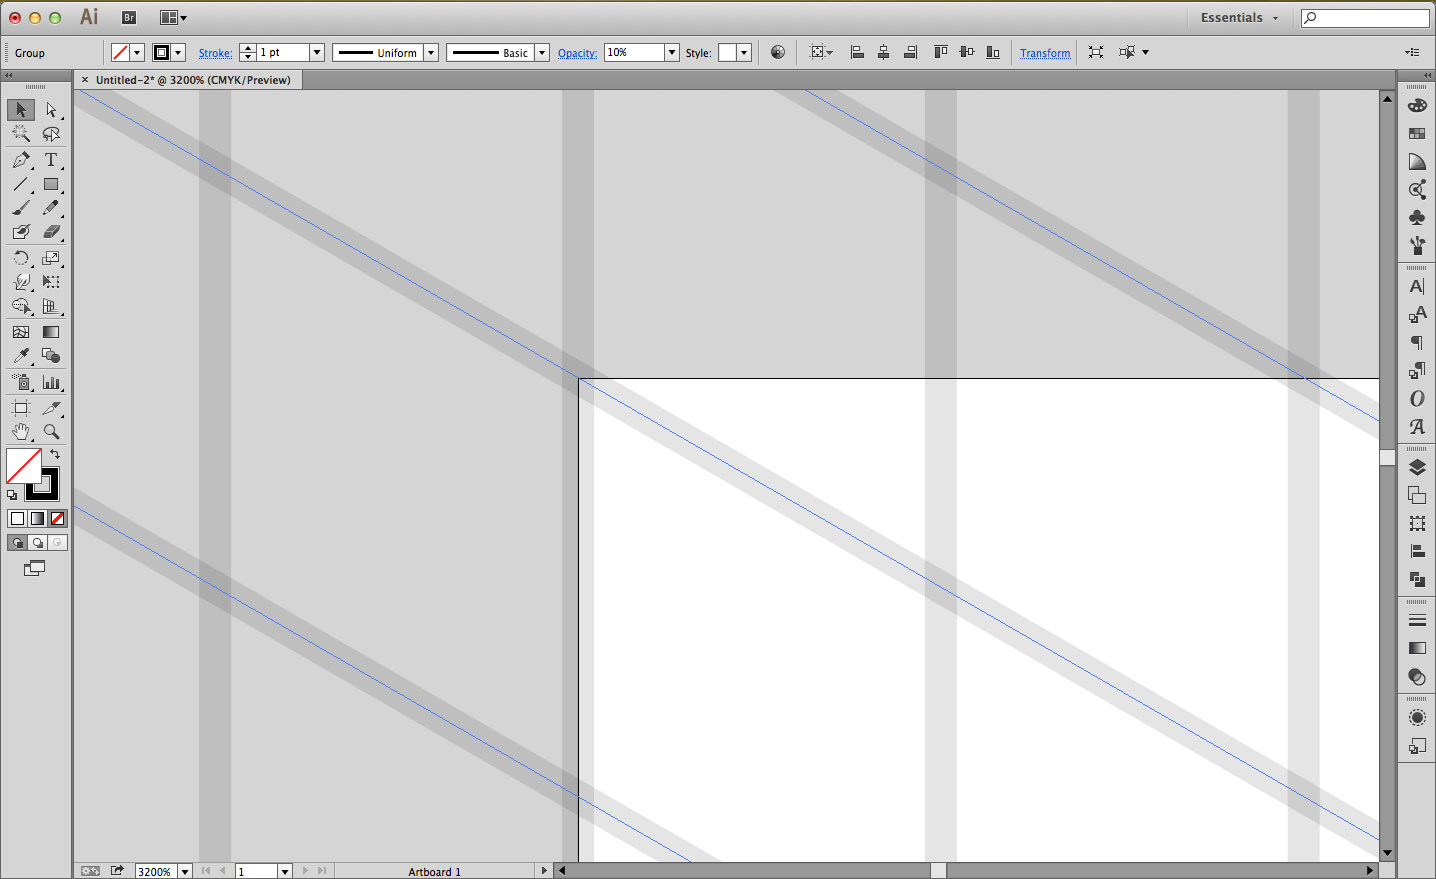
STEP 6 – Position the new Lines
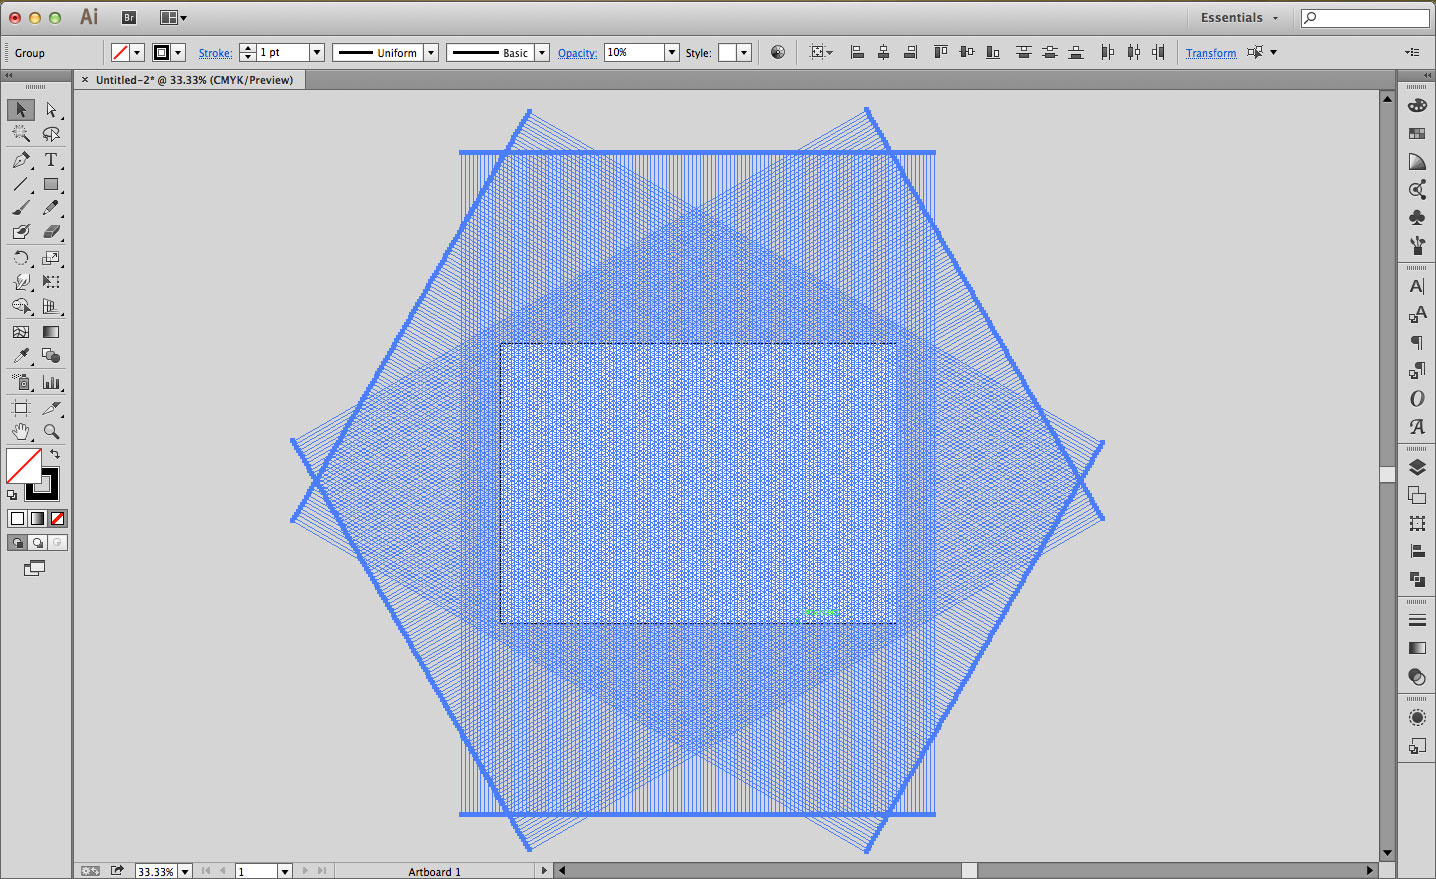
Without deselecting the newly created lines, zoom into the stage (Mac: ⌘ + + | Win: CTRL ++) and position the lines so that they cross the top left corner of the artboard as shown below. I did cheat slightly on this one by knocking back the opacity of the lines to 10% which made positioning a lot easier.
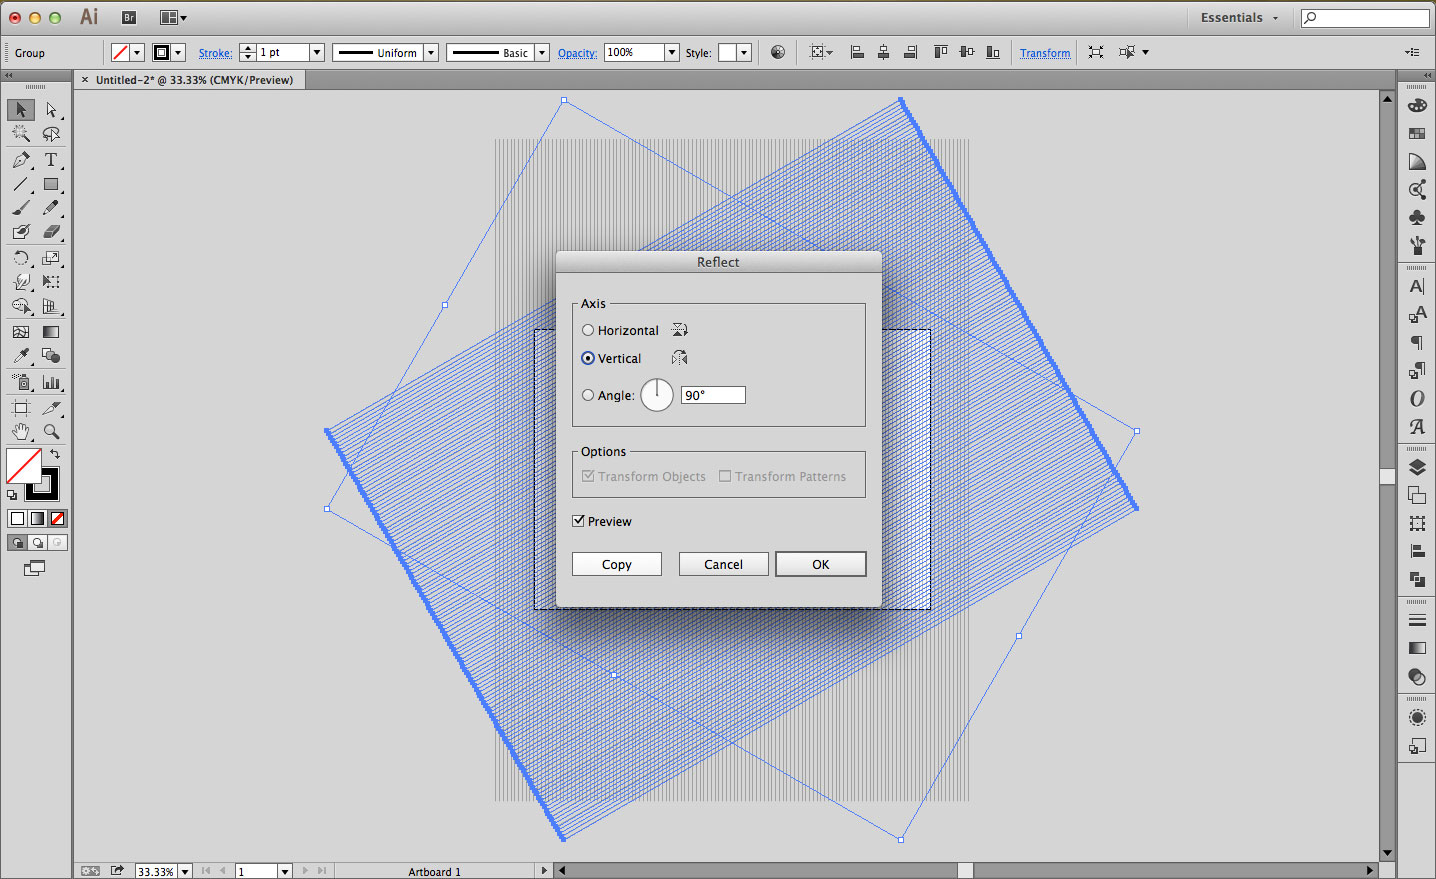
STEP 7 – Reflect & COPY the new lines by 90º
REFLECT TOOL: OBJECT > TRANSFORM > REFLECT…
With the correctly positioned lines still selected choose the Reflect tool from the Transform menu. As shown below, select the Vertical radio button, enter 90 for the angle then hit the Copy button. You should now have a third duplicate set of lines on the artboard.
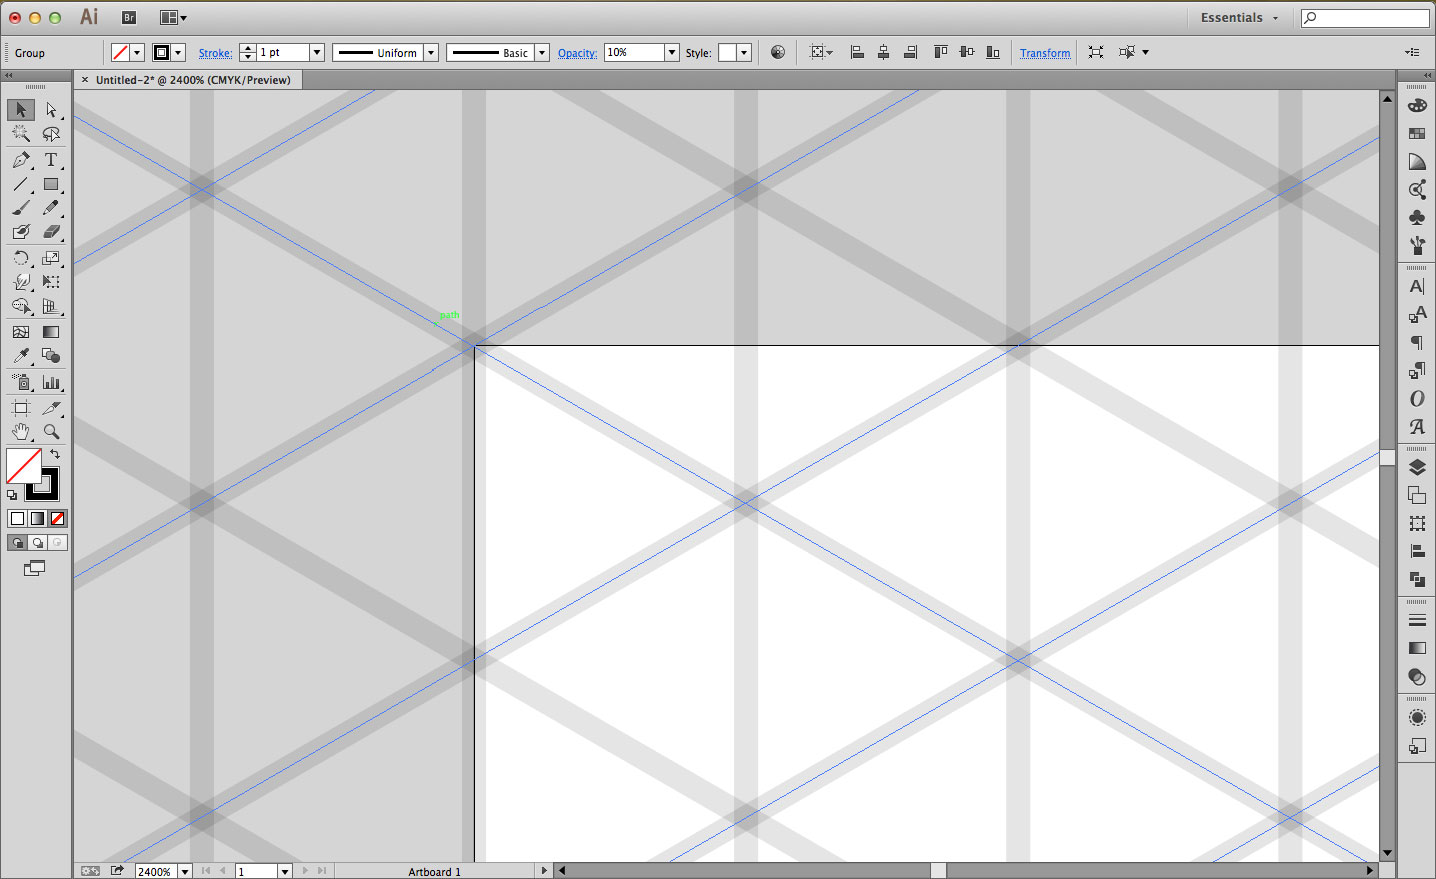
STEP 8 – POSITION THE NEW LINES
In the same was as Step 6, position the third set of lines so that they cross the top left corner of the artboard as shown below.
STEP 9 – Select all the lines
Select > All
[MAC: ⌘ + A | WIN: CTRL + A]
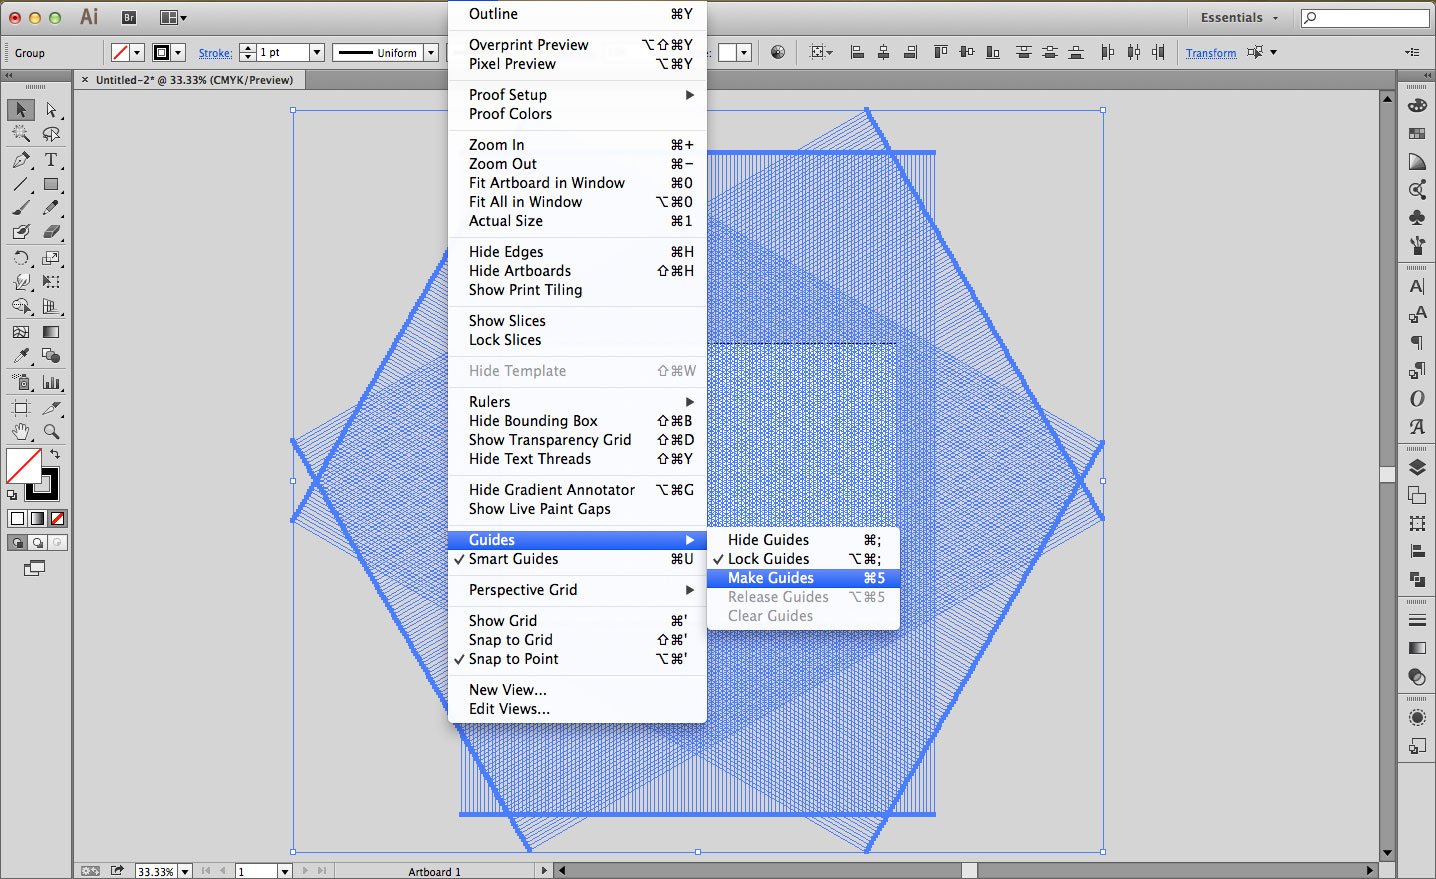
STEP 10 – Create the guides
View > Guides > Make Guides
[MAC: ⌘ + 5 | WIN: CTRL + 5]
As shown in the screengrab below, create your guides based on the lines you’ve created.
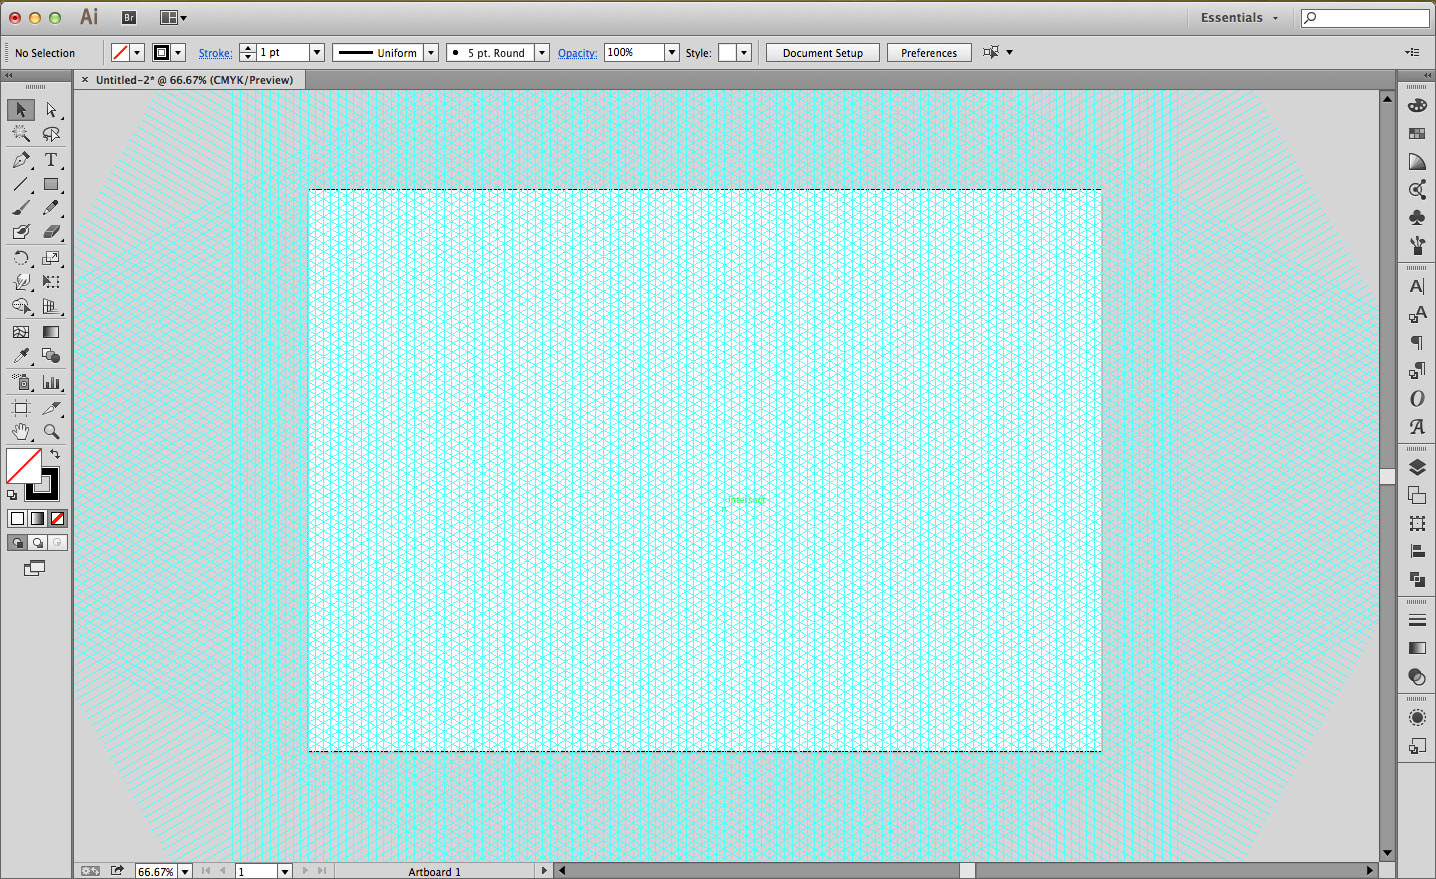
The Result
Once you’ve done this the lines will turn Cyan and can be used to snap objects to in illustrator. That’s it – you’re done.
Free Downloads:
a3-isometric-grid-guides.ai.zip
NB: I’m going to be adding more files here over the next week including Photoshop custom shapes & printable PDF so be sure to check back.